
Water
Transport
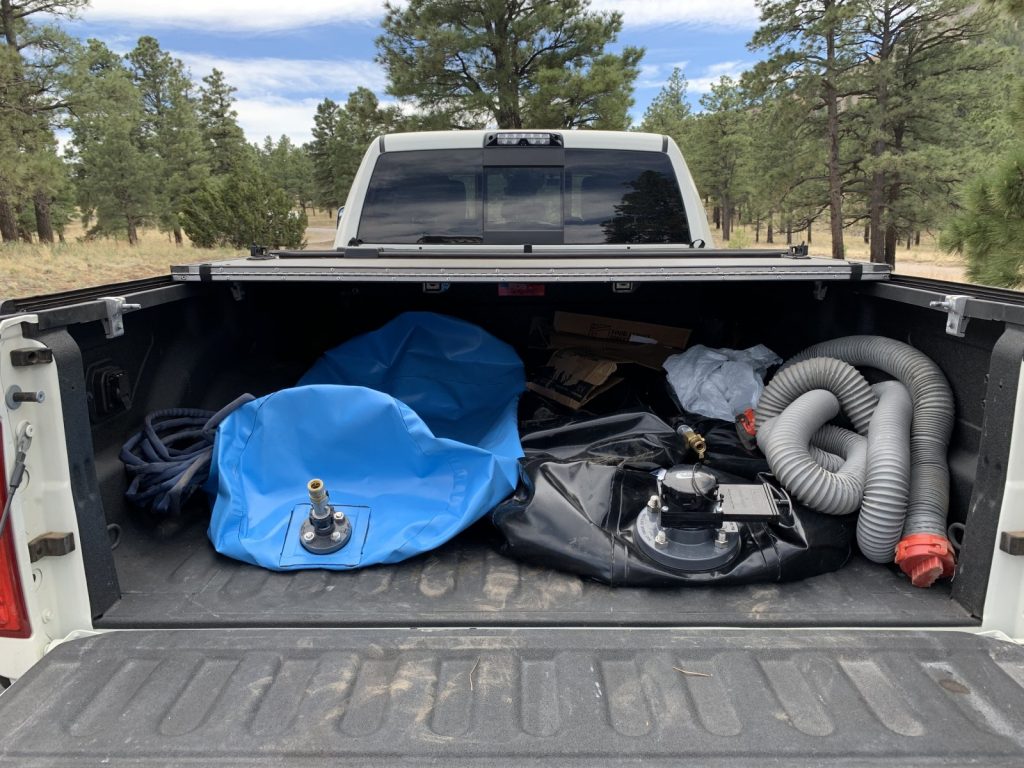
Several years ago, I contracted with Husky Portable Containment to have a pair of water bladders built that would fit in the bed of my pickup when not towing the fifth wheel. I converted the fifth wheel to a Reese Goosebox V2, and use the Ram OE puck system gooseneck ball so that I had a flat bed about 30 seconds after unhitching. We used this system for a couple years, without issue.
We went through several iterations with that, eventually moving all the grey/black connections to 1-1/2″ camlock fittings and using a SaniCon built-in macerator pump instead of a portable one. At some point we eliminated the black tank by going to a waterless toilet, and combined the grey and black tanks for additional grey capacity. The water savings (including of potable water) are tremendous.
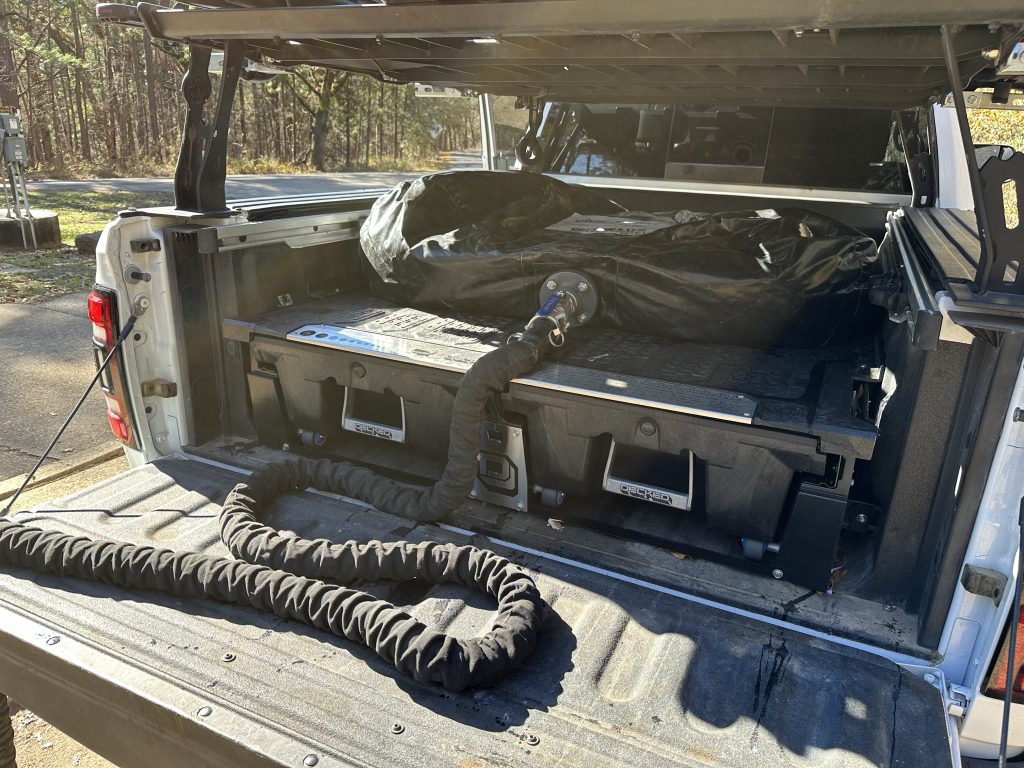
Now that we have a motorhome, we tow a Ram Power Wagon, which has a 6.5′ bed. I initially had a toolbox behind the cab, so I had two bladders built to fit behind the toolbox, that fit 140 gallons each. One holds fresh, and one holds grey water. We’re still using the camlock fittings, but now with better stainless steel ball valves and sheathing over the factory SaniCon hoses, with two 25′ layflat extension hoses.
We use a Milwaukee M18 transfer pump to move fresh water, after trying several pumps, we found it to be the best. Same with the SaniCon 400S.
Filtration
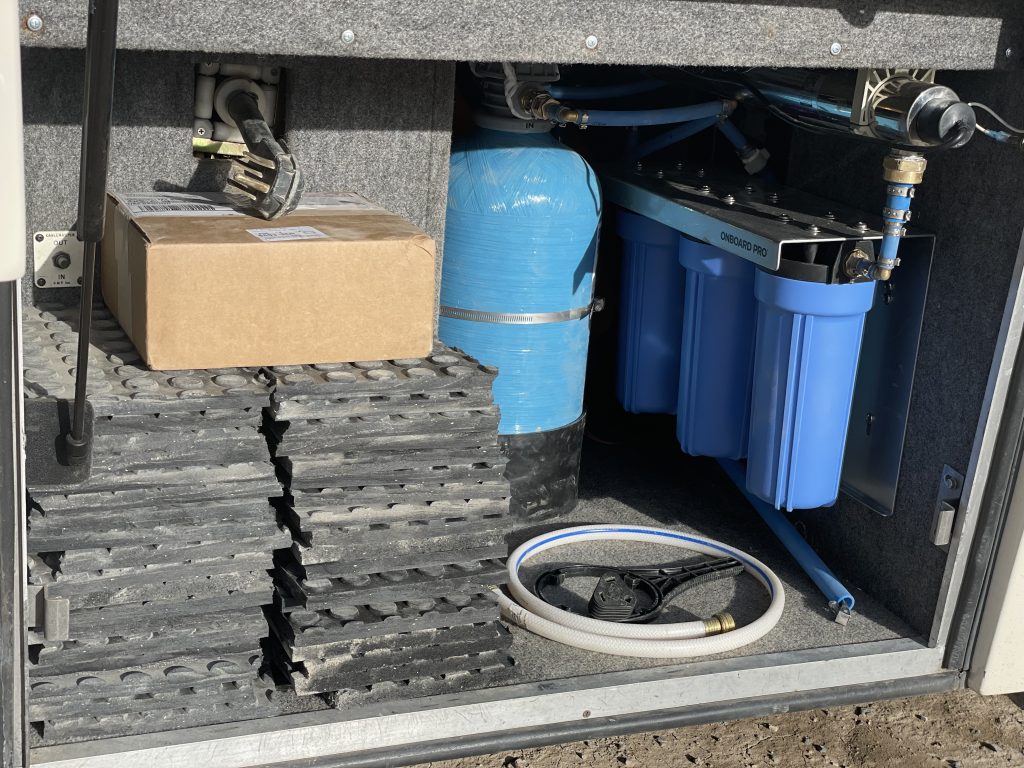
Since we get water from a variety of sometimes questionable sources, we opted for a triple filtration system by Clearsource, the Ultra Onboard Pro. We also added an iSpring UV light and On The Go Double water softener, all mounted in the bay so there is no setup/teardown necessary when moving. All fresh water and all water that comes out of the tank goes through these components, so water that sits in the tank for a while will be filtered upon use.
Waterless Toilet
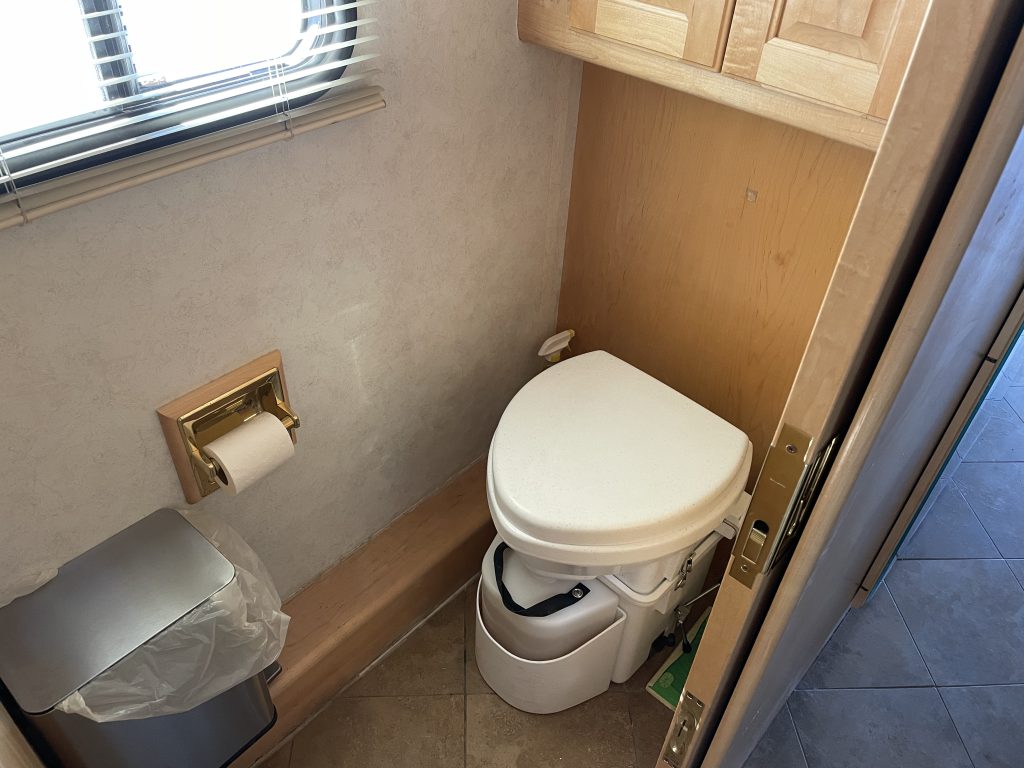
We had an Air Head composting toilet in our truck camper, which we sold with the unit. We generally liked the Air Head, but due to availability, opted to put a Nature’s Head in the motorhome. The Nature’s Head works more or less the same but has some small differences, and I believe the Air Head to be a slightly better design due to the liquid bucket design (doesn’t require solids to be opened to empty the liquids) and much more compact hinge mechanism. I also preferred that the fan pulled rather than pushed, meaning that you did not need an electrical source to be at the toilet, but rather at the exhaust. Both are more or less the same, and I’d recommend either of them over a conventional flush toilet if you spend much time without hookups. Either model costs around $1K, with trivial install costs. Consumables (coco-coir and vinegar) run maybe $5-10/mo, if that… probably less.
Recently, we decided to make a change and try an incinerating toilet. There are several models available, but only one that is designated for RV/marine use sold in the United States… one that also happened to be the only one that could have the exhaust ducting ran where we would need it. That’s the Cinderella Travel, which we pondered over for a long time due both the initial and ongoing costs. The initial cost is about 5x the cost of a composting toilet, and the ongoing costs include propane and liners – we’re figuring the consumables may cost as much as $60/mo. We aren’t paying any other utilities, so we’re kind of looking at it as a utility bill.
Why would we pay so much for a toilet, when we had a working composting setup? The composting setup works for many, and served us well, but we had a host of minor complaints that added up over time, so we were interested in other options.
- Guests don’t like using them – the idea of a host eventually having to deal with their waste distresses some people
- Women really need to separate solids and liquids, in order for the diverter to work properly
- Men really should sit to ensure the diverter works properly
- They do not work as well in high humidity environments (can’t dry everything out), and we traveled extensively on the PNW coast last year with plans to do so again
- They can get bugs in them – this only happened twice in three years for us, but it wasn’t great
- Emptying liquids daily and solids monthly – and figuring out where to dispose of those
- Nothing actually composts in that time frame when you’re using it full-time
- Potential air quality concerns, though none were apparent to us (“are we nose-blind?” etc)
We really like the upgrade.
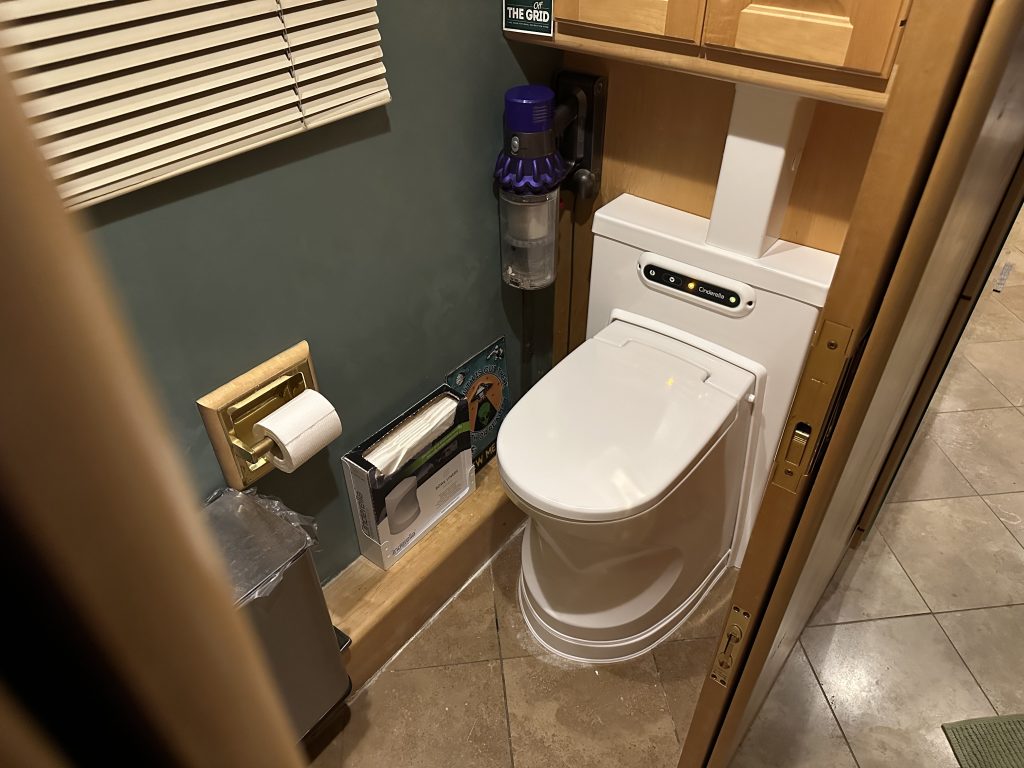
If you look to the side of the toilet, there is a box of liners in a holder attached to the wall. Those liners come in boxes of 500 and cost around $67. I figured we’d use a box every two months, assuming 8x liners per day, but we may use a little more or less. I figure approximately $30/mo for liners.
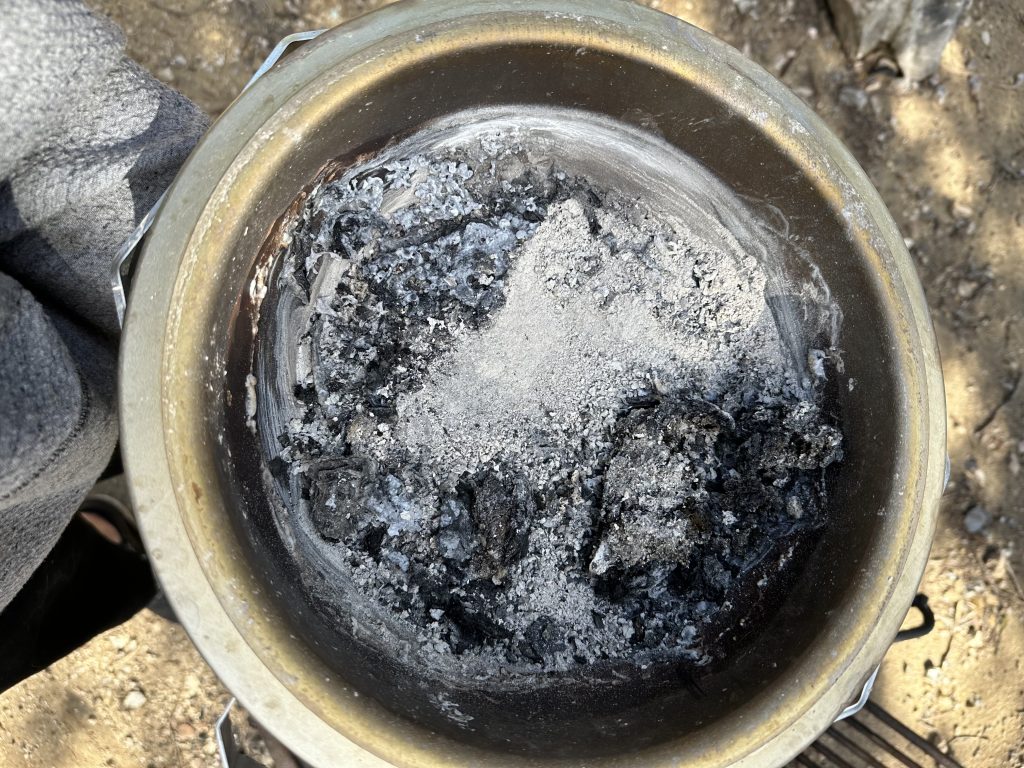
Anything that goes into the toilet must go in a liner – the liner drops down into the combustion chamber when you flush and propane is used to heat the chamber to around 1000F. It will cycle the burner on and off to maintain that temperature until everything is incinerated – I assume it uses a humidity sensor to determine this, based on my observations. I’ve read that most couples go through a 7 gallon cylinder in about 3 weeks, but we haven’t gone through a 19.4 gallon tank yet so I have no idea on consumption. At 7/3 or 2.33 gallons per week, that would be around 9.3 gallons per month, which works out to be around $30/mo.
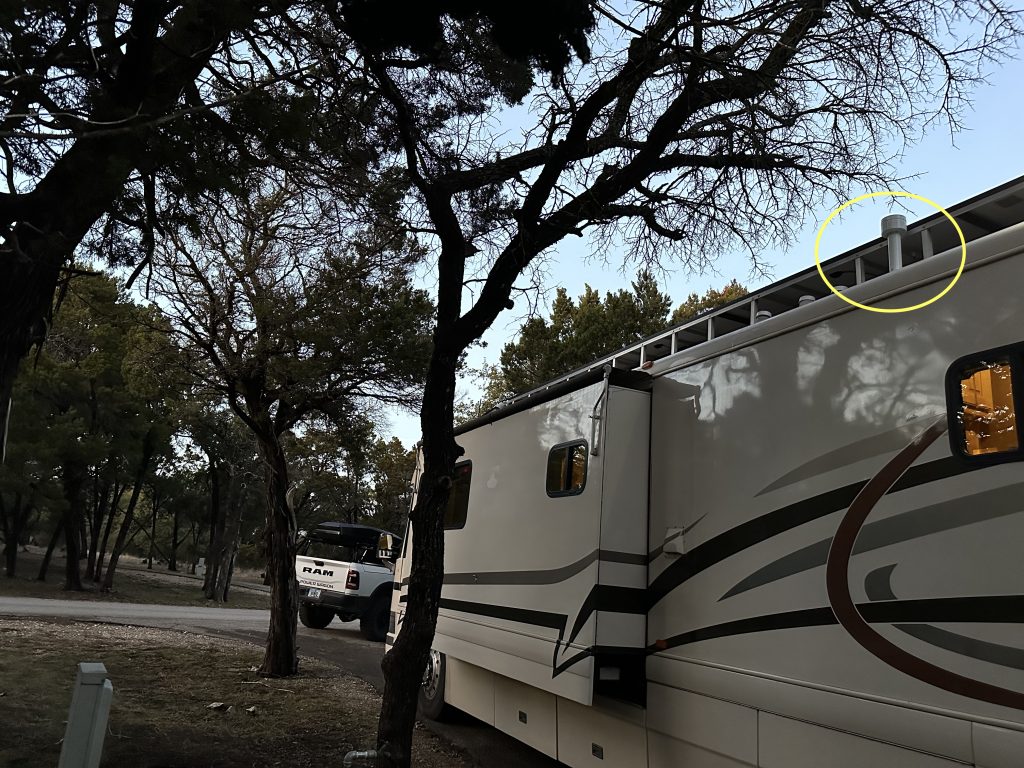
Any worries about smell were unfounded. It uses a catalytic converter which seems to do an exceptional job of eliminating any organic smells – while paper smells tend to pass through. So all you smell during a cycle (and only outside the rig, where the exhaust pipe is on the roof) is a faint burning paper smell from the wax liner and any paper products.
The only downside we see, aside from costs, is that if one of these fails, it’s a lot more complicated than a composting toilet. A composting toilet will still work when it breaks – this probably won’t. At the moment, we’re still carrying around the Nature’s Head in our basement… not sure if we’ll drop it off when we go to our storage next, or not. I will say we’ve been spoiled by this and our build out costs for another rig will now include one.
Quick Summary:
- Clearsource Ultra Onboard Pro RV filtration system
- iSpring UVF55FS whole house UV water purifier
- On The Go Double water softener, permanently mounted
- Cinderella Travel incinerating toilet w/ build-in box
- Husky Portable Containment custom 140-gallon potable water bladder
- Milwaukee M18 portable water transfer pump
- Husky Portable Containment custom 140-gallon grey water bladder
- SaniCon Turbo 400S w/ 75′ of camlock hoses plus 75′ Zero-G (transfer pump for grey water)