
New Workshop
This content has been archived. It may no longer be relevant
I finished up the last of the renovations to the house yesterday, when I completed the replacement of all shower valves, trim, shower heads, drain piping and covers. I’ll start posting more often now that it is done, going back and discussing the changes we made and the thought that went into the decisions we came to.
Of those renovations, one of the most exciting things for me was the build out of a proper workshop. I’m always working on projects, but have never had the room or organizational abilities to best utilize my time. That’s made projects run over budget, over schedule, and generally be a lot more stressful than they needed to be. I decided to resolve that with a proper workshop (which, in itself, ran way over budget. Go figure).
We have an 18.5′ x 20.5′ two car garage (379.25 sq ft) with a water heater in the corner. The floor was coated with layers and layers of paint, varnish, stain, bedliner, and other finishes. I started by pouring a gallon of muriatic acid over part of the floor, which is commonly used to clean and etch concrete floors like ours. Ultimately, after seeing the results, and doing more research online, I decided to go a different route for the flooring and am very glad I did. I found a company called GarageTrac that sells a heavy duty plastic interconnecting tile that you lay over the floor, that is designed specifically for garages and workshops. I purchased 400 sq ft of it, half in “Alloy” and half in “Graphite”, and after cutting to allow for edges, around doors, trim, etc, ended up with about 8 sq. ft of entire tiles left over (and a lot of scraps that I tossed).
I didn’t want to spend the time to fix the drywall, which had peeling tape, destroyed texture, lines running in every direction from various past mounting devices, and holes all over from nails and screws, but I wanted to improve it, so I sprayed the walls with two gallons of Behr Ocean Storm. I had the paint on hand because we used Valspar Ocean Storm inside the house, but for the most part actually used Sherman William’s paint, and Sherman William’s matched the wrong big box store color code giving us the blue sold under that name at Home Depot instead of the grey under that name that Lowes sells. I didn’t have enough to cover the wall with the door, so I threw the Valspar color on that wall. The sprayer I used is my Graco Magnum X7, which made the entire process take about twenty minutes since I didn’t care about overspray on the floor.
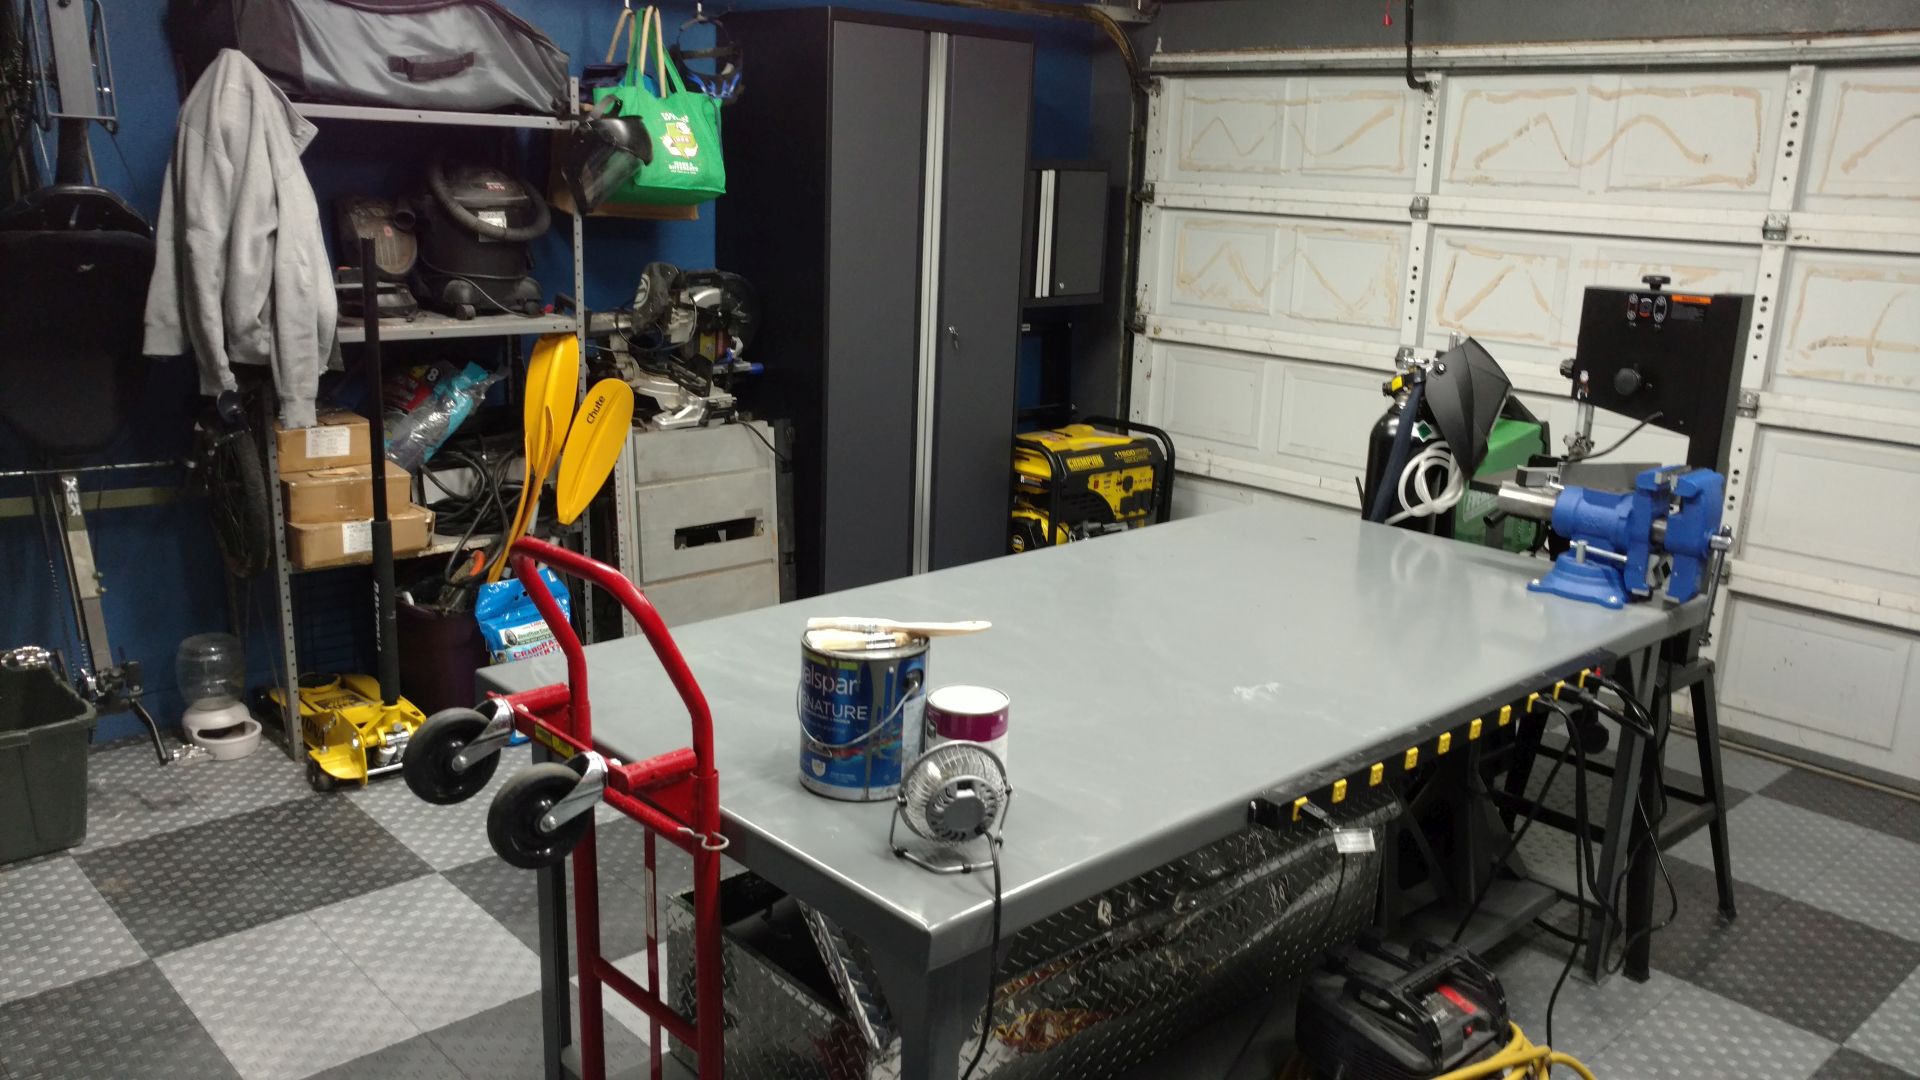
After painting, I installed the new floor, then brought in a new shop table. The table is a 84″ x 42″ Little Giant WW-4284, which is 461lb beast that is rated to hold 10,000lbs. Finally, about a month later, I received my New Age Pro 3.0 cabinets and mounted them on the wall. One of the wall cabinets had a reddish finish, so I called New Age about it and they sent a replacement out the very next day, telling me to dispose of the old one. Instead, I allocated it to another wall. Can’t beat a free spare cabinet like this.
I’m still working on organizing everything, but so far it is really nice knowing where all my tools are at. I love my new work table and the tools I bought to flesh out my collection. I’m still getting accustomed to TIG welding but that’s going to facilitate a lot of neat projects in the future. In the next few days, I’m going to start planning an outdoor bar for the back porch that uses metal framing with cedar planks. It will double as a herb planter (inspired by this design):

Finally, without further ado, here are the photos of the garage:
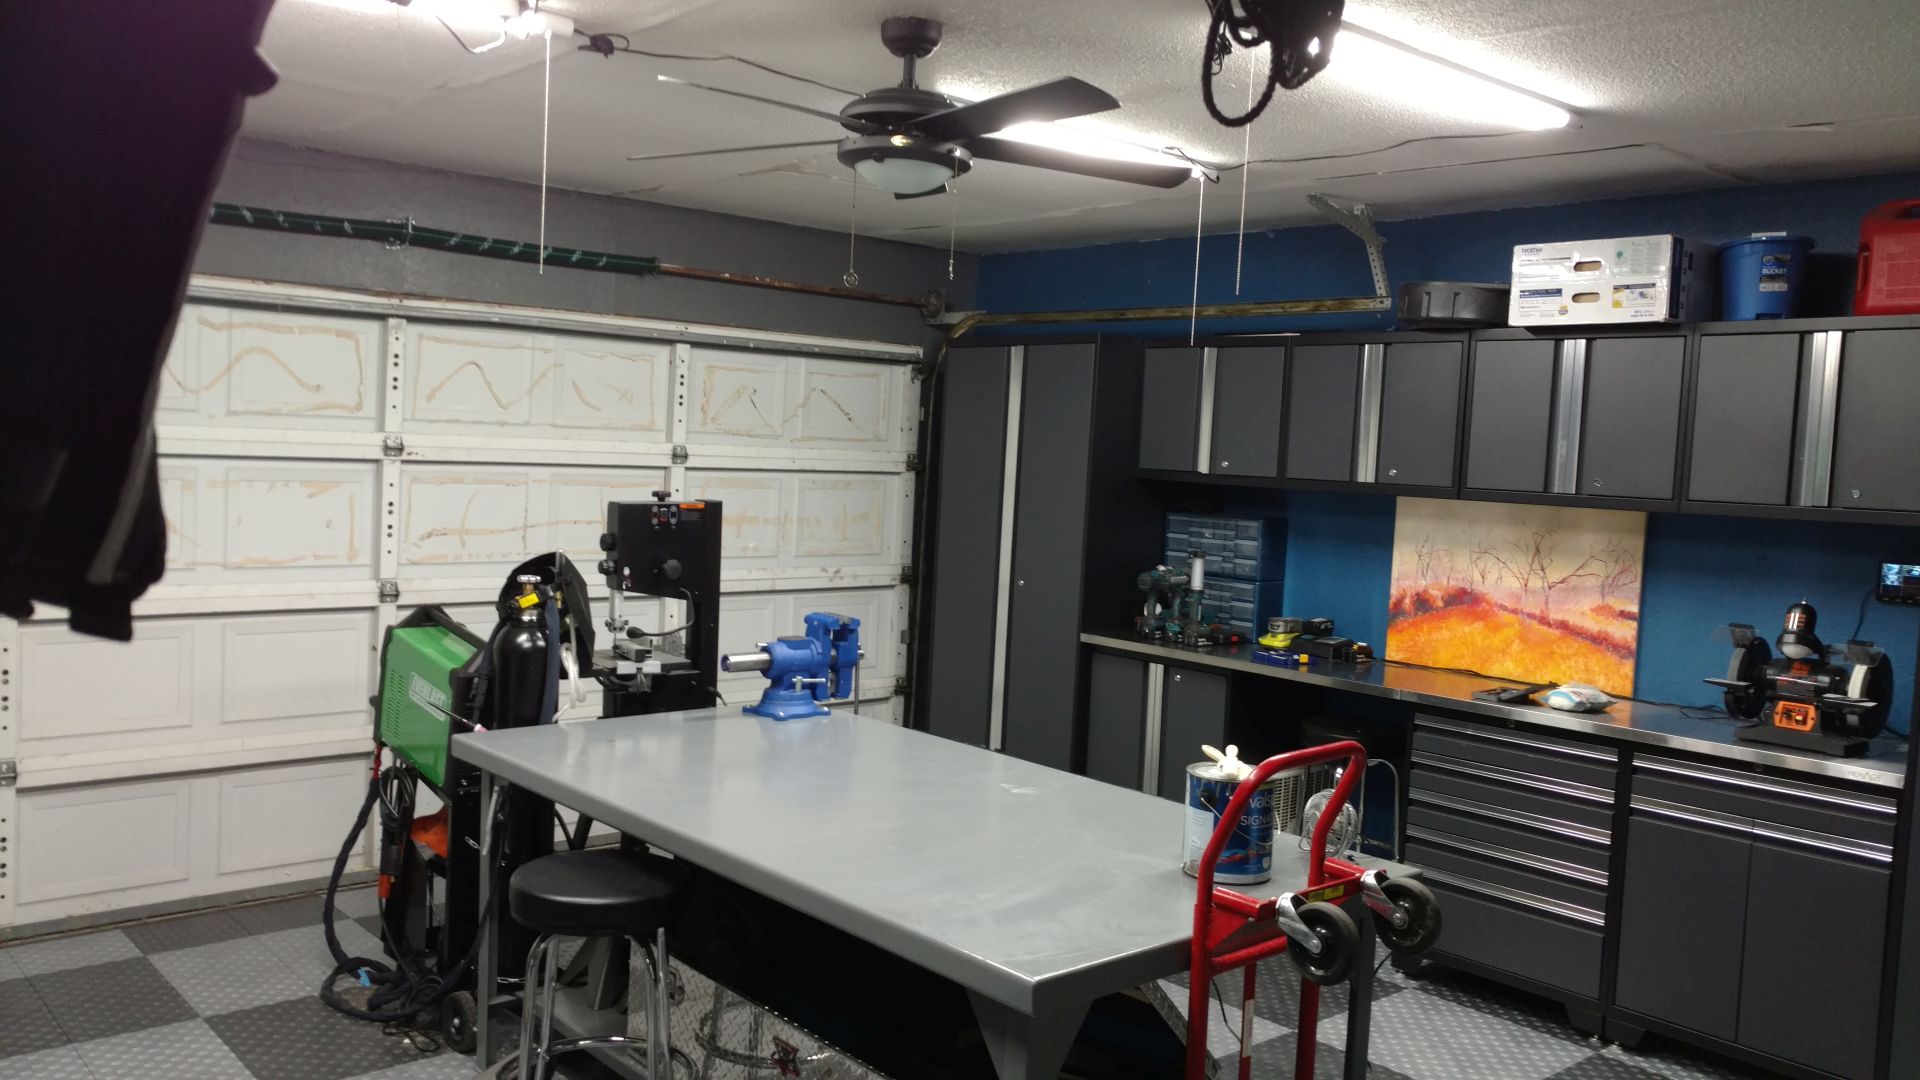
From the doorway leading into the house. Notice the LED lighting on the ceiling which makes it feel like daylight throughout the entire garage.
From the corner near the water heater.
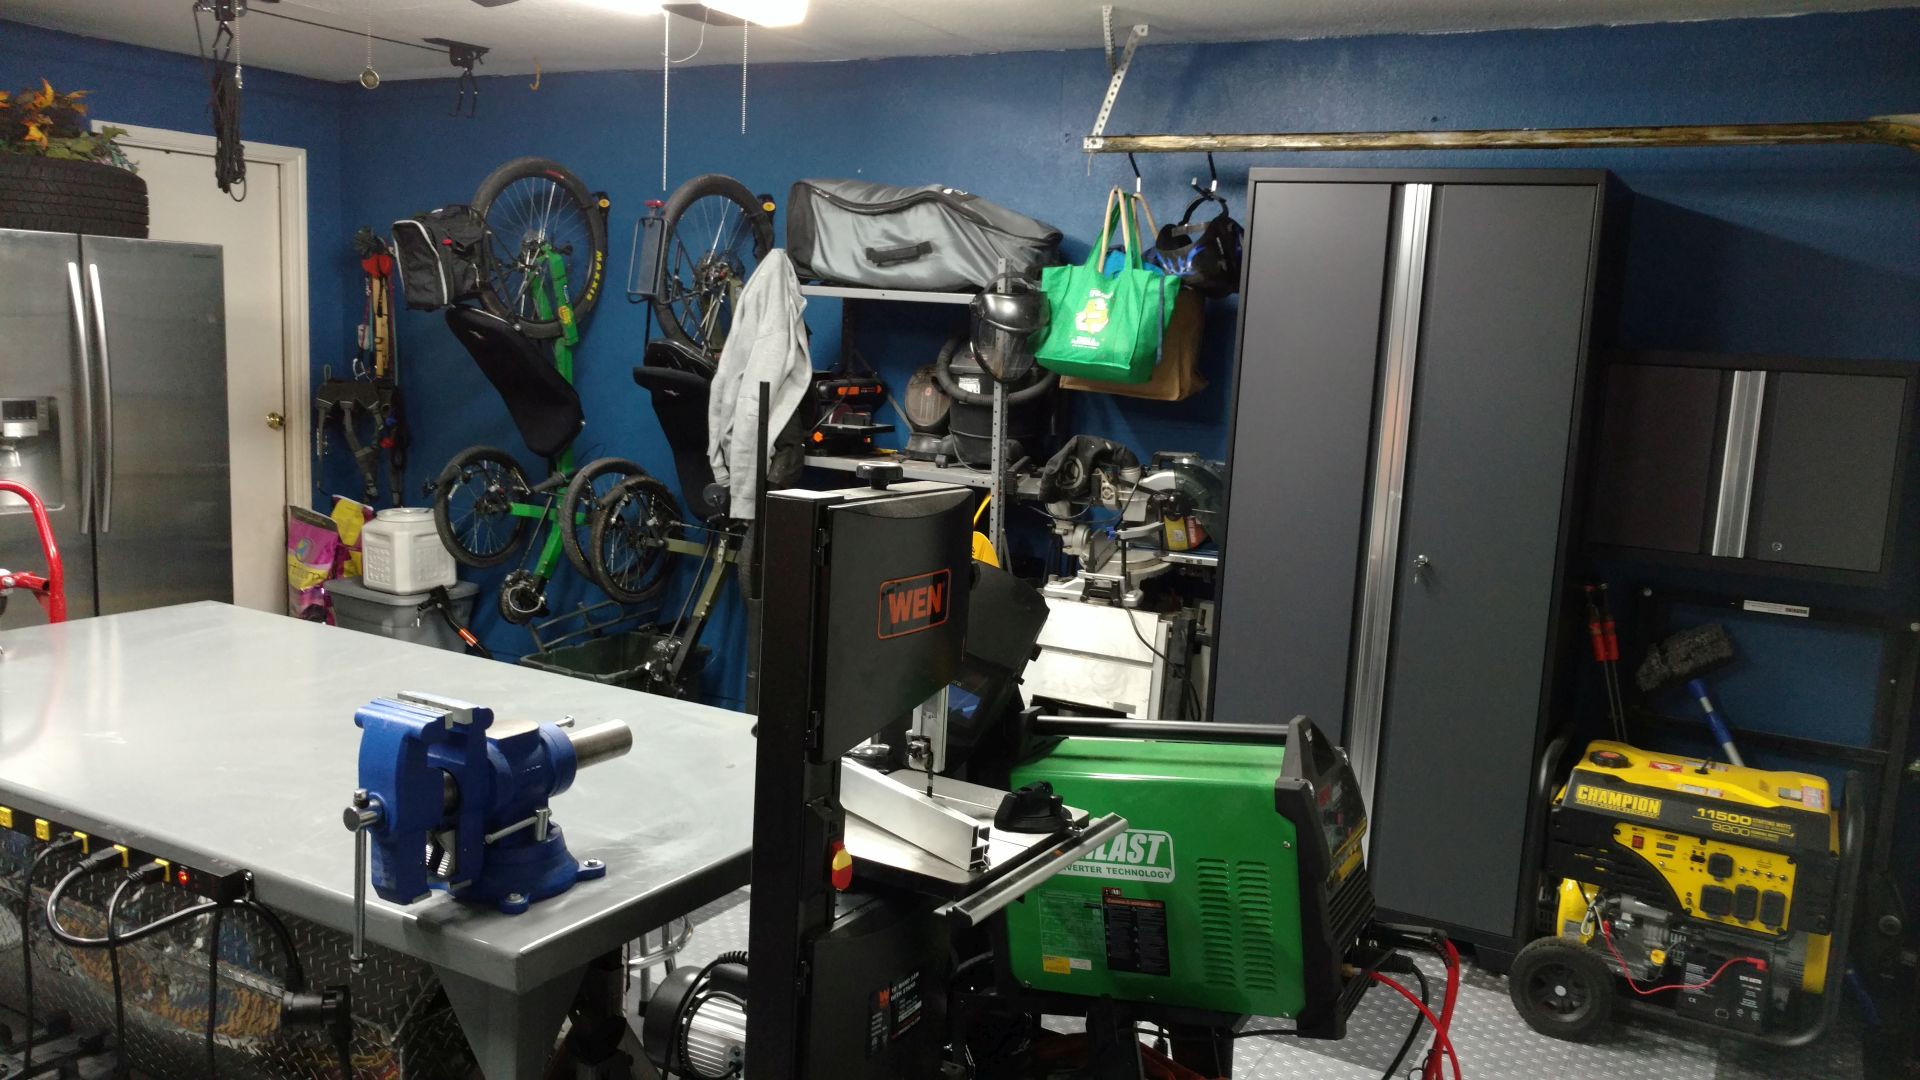
Over by the left side of the garage door, from the outside of the house. Notice the electrical on the backside of the table. Also, this wall (far right side) is where I mounted the extra wall cabinet.
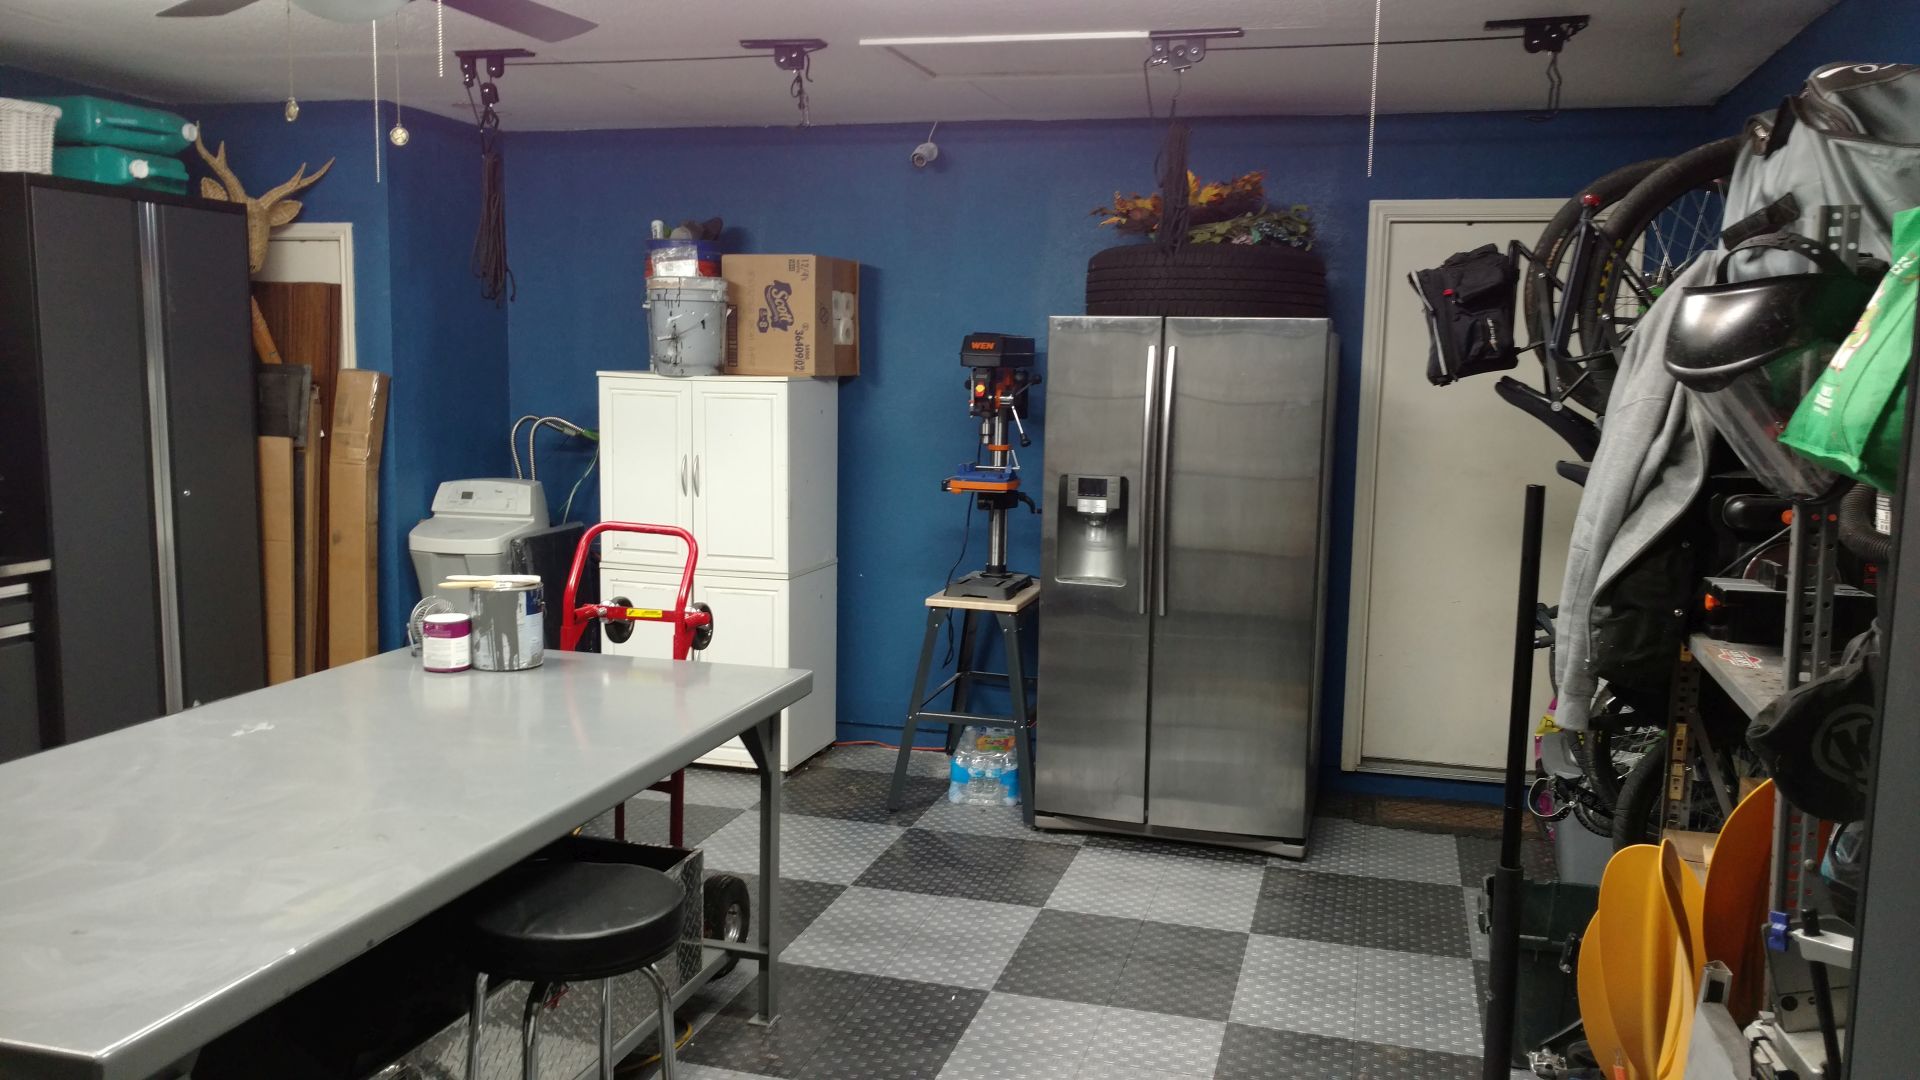
From the right side of the garage door. That refrigerator was inside the house, but when we replaced the kitchen fridge we shuffled this one into the garage. I ran water to it from the water softener hookups for ice and water. Also, notice the security camera on the back wall. It’s one of a few I’ve put around the house as a roll your own security system and theft deterrent. It’s part of a system made by Lorex and came highly recommended by a coworker. I should have bought a four camera system, as I’m using five currently and could have gotten by with four. Instead, I have a sixteen camera system with eight cameras on hand, so I need to find places to install the others. Could have saved some money on the lower end system, but then I might have had some regrets and wanted to upgrade later on. We’ll see. The camera on the back wall is less about security and more about being able to verify the garage door is closed. I’ll often wonder when I left the house if I forgot to close the door, and with the Lorex system I can just pull it up on my cell phone and look. The system is completely locally hosted (not cloud) but I am able to backup the footage to the colo facility I lease.

Another shot from the same spot. You can see a small screen on wall under the wall cabinets, that rotates through the security camera footage.